Running a contest now on Facebook! The 20th person to "like" Love Green will get a free 3 oz lotion (made with Rosemary or Eucalyptus essential oil) or 4 oz body scrub (made with all natural, edible ingredients!). The person who referred them will get a free 8 oz body scrub, or two free 4 oz body scrubs! This free item includes U.S. shipping, but not international as it costs a fortune to ship things outside the U.S.
Good luck!
7.26.2011
7.12.2011
So Sorry!
I apologize for such a long delay! I recently moved and became very busy with school and managing the new place. Moms have so many chores! Oy.
I have not had any time to craft, but I have been gathering up fabric, buttons (oooh the buttons! You will see :) ), and other items essential to crafting. I have big plans to make a steampunk outfit for my birthday coming up soon (probably too soon to get the outfit done!), and other little things.
Keep checking back, and I'd love to see some comments!
6.05.2011
Product Orders
Now that I am up & running with the business, feel free to order anything you have seen me post before, or something similar. When I make an order I'll be sure to take pictures and post them so that you all will know what I can do. For now, let me know what you want and I'll give you a price estimate.
Shipping inside the U.S. starts at $3. Sadly I cannot do international shipping at this time (the lowest shipping rate is $35.50. For that you can easily hire someone much closer to you to make the same item).
I'm looking forward to two weeks off of classes! I get to sit at home, work on jewelry, and watch Dr. Who all day.
~To place an order simply post a comment with the item you want and an e-mail address. I'll log your order and send a confirmation e-mail~
6.02.2011
The Business Is Slightly More Official
Crafting a Better Future is launching its business! You can find us on Facebook here, or email us at LoveGreen.Artistry@Gmail.com.
While you're at it, check out Blue Heart Art. They are a wonderful local business who showcases artists, like myself, in their beautiful downtown shop.
As soon as I get it completed, I'll post the logo here for you all to see. I can post my sketch of it however. The finished version will be more stream-lined and professional-looking.
5.30.2011
I'm Back!
We got a new machine, and I'm back in the game!
Since Friday I've been working on a pinwheel quilt for myself, and one for my son. I have nearly finished the top for a quilt for a friend's baby, and I've made the tops for a few mug rugs. I've certainly been busy!
This was originally going to be a mug rug, but I fell in love with the fabrics, the pattern, and the quilting. So instead of doing a bunch of mug rugs, this is now the first piece in my quilt-as-you-go quilt for myself. My son's is green and blue pinwheels.

Unfortunately this is the only picture I have for you right now, as my camera's batteries are nearly dead. I promise there will be more photos soon!
3.09.2011
The Sewing Machine Broke!
So, until we can get it fixed, I am unable to do a lot of sewing unless I want to do it all by hand.
I am working on an embroidery sampler, though. In a month or so I will be teaching a friend and her 2 daughters how to do embroidery, so I am busy whipping up a sampler with a bunch of different stitches and techniques. I've found some really cool ones here. It's a really cool blog that has been very helpful in my embroidery endeavors.
I am working on an embroidery sampler, though. In a month or so I will be teaching a friend and her 2 daughters how to do embroidery, so I am busy whipping up a sampler with a bunch of different stitches and techniques. I've found some really cool ones here. It's a really cool blog that has been very helpful in my embroidery endeavors.
2.24.2011
Clothing Refashion & Somewhat Tutorial
This is a project I have been working on for a little while now. I got most of it done on a Saturday, and when the day was over it was put away in my "works in progress" bin. I brought it out again today & discovered a dastardly mistake, which I will reveal later.

Here is the before picture of the size 24 stretch slacks that I started with. I helped a friend out with her wedding, and as a payment her mom gave me her old fat clothes, knowing that I love to repurpose clothing. The bigger your starting pieces the better, I say.

See the fancy zipper, double button closure? I actually didn't use it lol but I think it will make a nice embellishment to some future project.

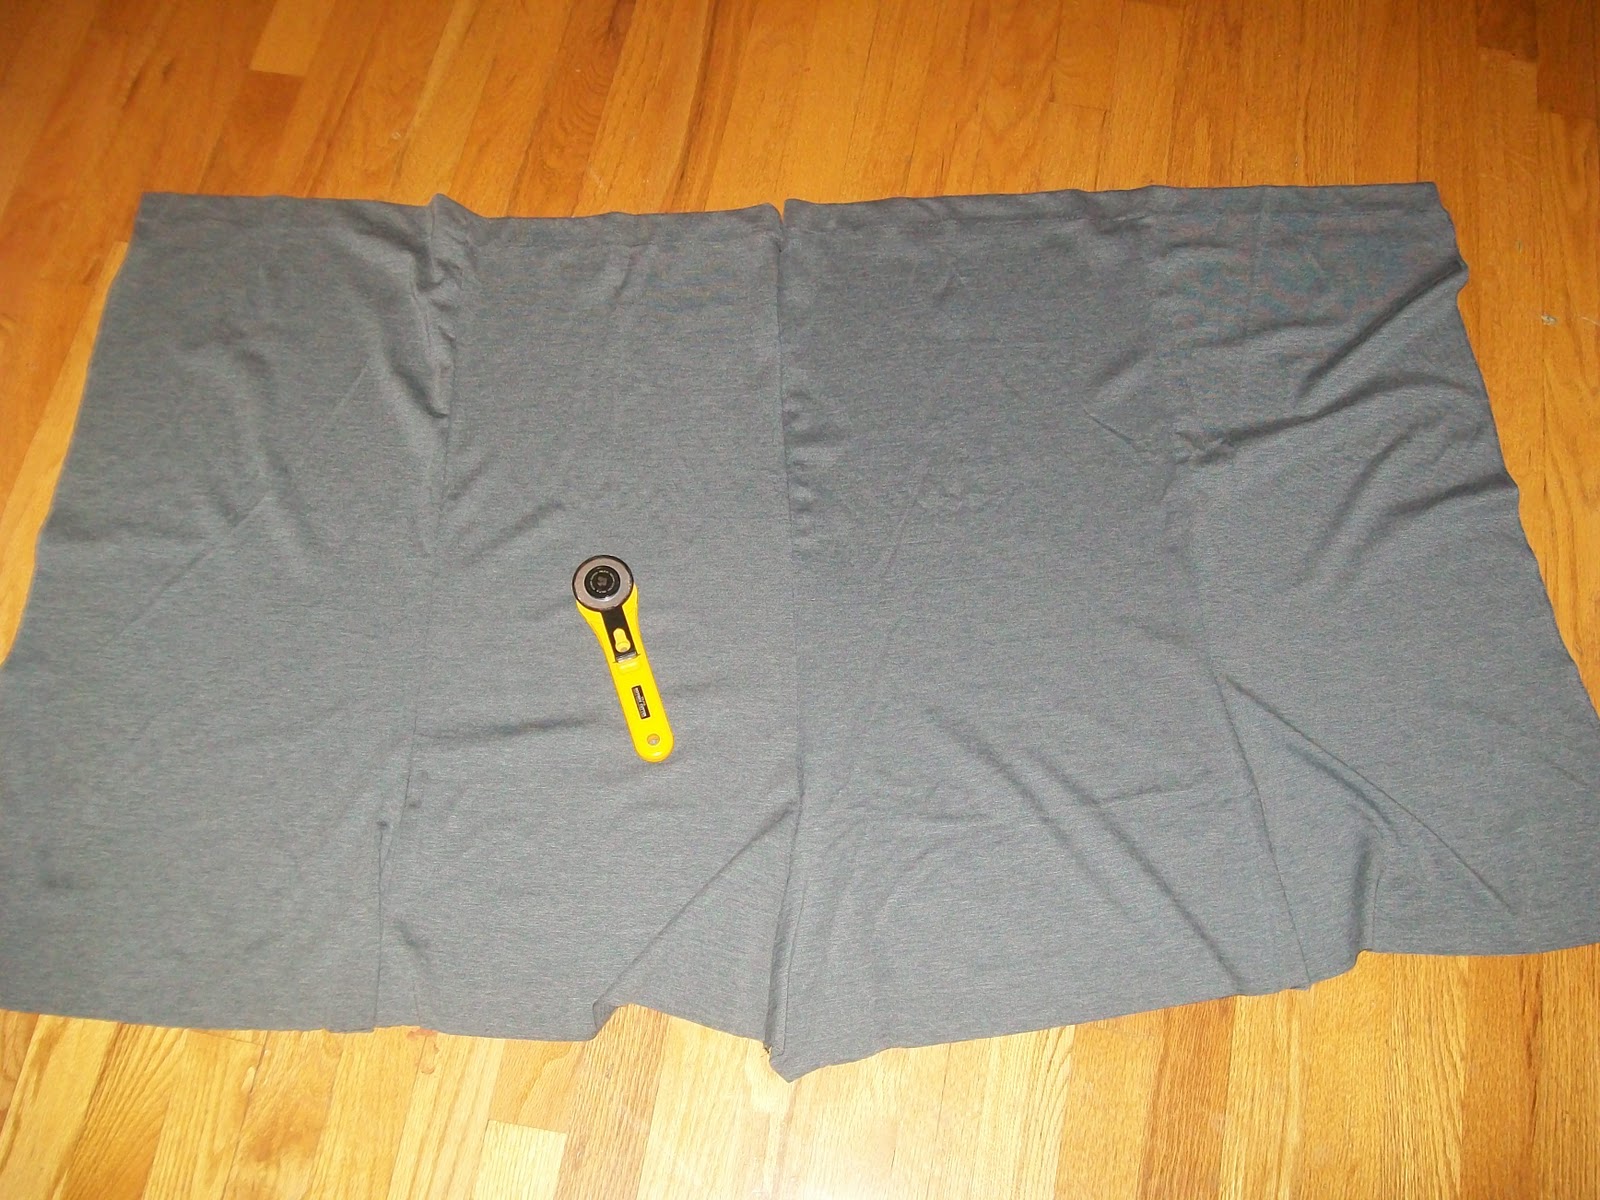
Here you can see that I cut off the entire leg of the pants with my trusty rotary cutter & ruler.

And the other leg, matched back up.

I took the pant legs and opened up one side seam on each, getting two large panels to work with.
Making sure to keep the already hemmed edges together, I sewed the two panels together to make one large piece.

This part was odd. The hems were done in such a way that I couldn't machine stitch them up like the rest, so I plan on hand stitching this part with whipstitch.

After fitting it around my body I determined that four panels was too much. So I removed one panel (one half of a pant leg) to get these three left.
I don't have a picture of this next part, sorry! But next I fitted it around my body again and decided that the bust was good, but it was a bit tight everywhere else (I'm still working off my pudge and I have somewhat wide hips) So from the part that I removed earlier I cut out a triangle and attached it in the back.

After finishing everything but the bottom hemming I took a look at my work and found this mistake! These pieces are supposed to be even, and this is at the top of the dress. Woops! Short of tearing apart the 3 seams involved & redoing it, what do you readers suggest I do to fix it?
Subscribe to:
Posts (Atom)